I feel as if even the people that don't follow me on Instagram but just read my blog will really enjoy this one (don't look so guilty ;)). It's that one blog post that I spill ALL. My pet peeve is when I see obvious nose contour! As a perfectionist, harsh contour really irks me. I don't know if people know that they are doing it or are intentionally going for the drag queen contour? not that there's anything wrong with drag queen makeup, If you like it then that's ok. Each to their own.

If that's the look you're not going for then read on! I'm going to explain my knowledge on nose contouring as much as I can and I will include diagrams to show you. Many of you reading this have either a bulbous nose, hook, slight hook, drooping tip, wide bridge, crooked from the front, long, short...which ever shape you have there is ways to make it less prominent. I'm not a surgeon so I won't promise perfect results...just enough for it to look smaller? defined? Yes.
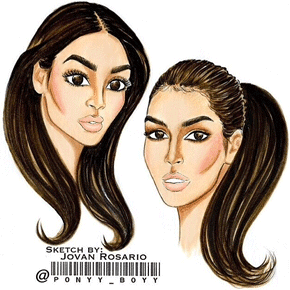
Some of you, like my sister Sonia might be blessed with a perfect sloped nose and others may have decided to choose to go under the knife and try rhinoplasty which is a personal preference. Some may fear of being unconscious and having their nose broken and reshaped. That's where contouring comes in (woohoo!)
The first thing to remember when contouring is: THE MORE YOU SHADE THE MORE OBVIOUS IT WILL LOOK! I see women in real life and all over social media and I am automatically drawn to the middle of their face because the contouring is either too harsh, too orange or too muddy making the nose look more prominent and masculine.
The contour shade you choose for your nose must be lighter than the one you use for your cheeks and the rest of your face. Whether you're using cream or powder it always has to be a cool tone. Cool tones mimic the natural contours and shadows of the face. ORANGE IS A NO!
STOP following the contour pictures you see on IG, everyone's nose is different and seeing the same contour and highlight on everyone's nose bothers me.
HERE WE GO.

1. If you have a wide bridge concentrate on shading out the darker areas of this diagram and then connect with the sides of the nostrils. This is best done with a cream contour. It will take some practice before you perfect it.
-------------------

2. You want to make your nose appear shorter but a little wider too. down your nose use a concealer that's three shades lighter after that apply the contour shade. Concentrate on the tips and the sides of the nose. Blend well is a 224 brush by MAC until seamless.
------------------------

3. STOP highlighting all the way down, you only need the tip highlighted. Shade out the bump, like shown in diagram.
---------------------------

4. Common mistake I see all the time. If you have a dent why make it look more obvious by adding darkness to it? Opt for the lighter concealer in this area. Don't worry it won't look funny, it's all about blending it well.
--------------------------------

5. Use a flat concealer brush to apply cream contour for precision, follow where the light grey colour on the diagram. You want to stop where I have put the black line. Use a powder or a white eyeshadow in the centre, making sure it's a thin line. Buff and blend with any small blending brush.
Best done over your foundation because it shows more but not too obvious. the key is to blend. I took so much time out to do these images. It's pretty simple to follow the pictures that's why there's less description. Be patient and practice. I'm not promising miracles but it's a difference.
Conquer that contour! wooop!
Fyza xoxo