Tom Ford Exclusive Scent Dinner In Dubai

4 comments
I did not expect this heat in October! That's the first thing I thought as I walked out of Dubai airport in my thick jacket and comfy joggers. I had just flown from London to Dubai for an exclusive event with Tom Ford. I was invited by Estee Lauder for a scent dinner with Tom Ford. What's a scent dinner? I've never attended one before so this should be interesting.

"Scent Dinners are the combination of fine dining with a stimulating interactive master class in scent & perfume, two parallel dinners, one olfactory and invisible, the other gustatory and edible."

Prior to the evening event I was invited to have a private makeup session with Matthew Tyler who is the International Education Director for Tom ford Beauty. I got to try the new products that had launched in the Middle East, I got to ask questions about each product as he told me what suited my skin tone best. It was such a great experience.

I know that many of you are huge fans of Tom ford products, espcially his scents. They are rich, long lasting and unique. Hearing how much thought that goes into a scent was very facinating for me. I love how we all have been thought about in so much detail when this scent was created. If you love Tom Ford scents as much as I do you will really enjoy this post. I want to make you experience it as much as possible through me!

The scent dinner was held at the Burj Khalifa and I was with around 10 other beauty bloggers from around the Middle East. I tried to take down as much information as possible so I could share it with you all. 


This was our menu. This dinner was for the new fragrance launch of Tom ford's Noir Pour Femme in the Middle East. Each course represented an element of the fragrance, so each course we were handed a stick with a scent which made up of the final scent. we weren't allowed to try the actual scent till the end of the meal. This is what our minds/imaginations were for. We had to guess what the final scent would be like based on the scent broken down.


There was Opulent, Addictive and Provocative. The three sides to a woman? maybe.

The first meal was Heirloom Tomato 'Tarte Fine' and it contained Basil, wasabi mustard, burrata and orange sense. From looking at the menu I instantly knew this scent has a fruity side to it which is definitely a favourite of mine. Once the dish was placed in front of us all we could smell the richness of this pizza looking first course. It tasted like the first scent we were given. it was so strange but amazing at the same time. 


The flavours together worked beautifully and the feeling of tasting a perfume you could smell is so hard to put in to words.

We were given a Ginger Sorbet with Orange zest to cleanse our palate for the main corse
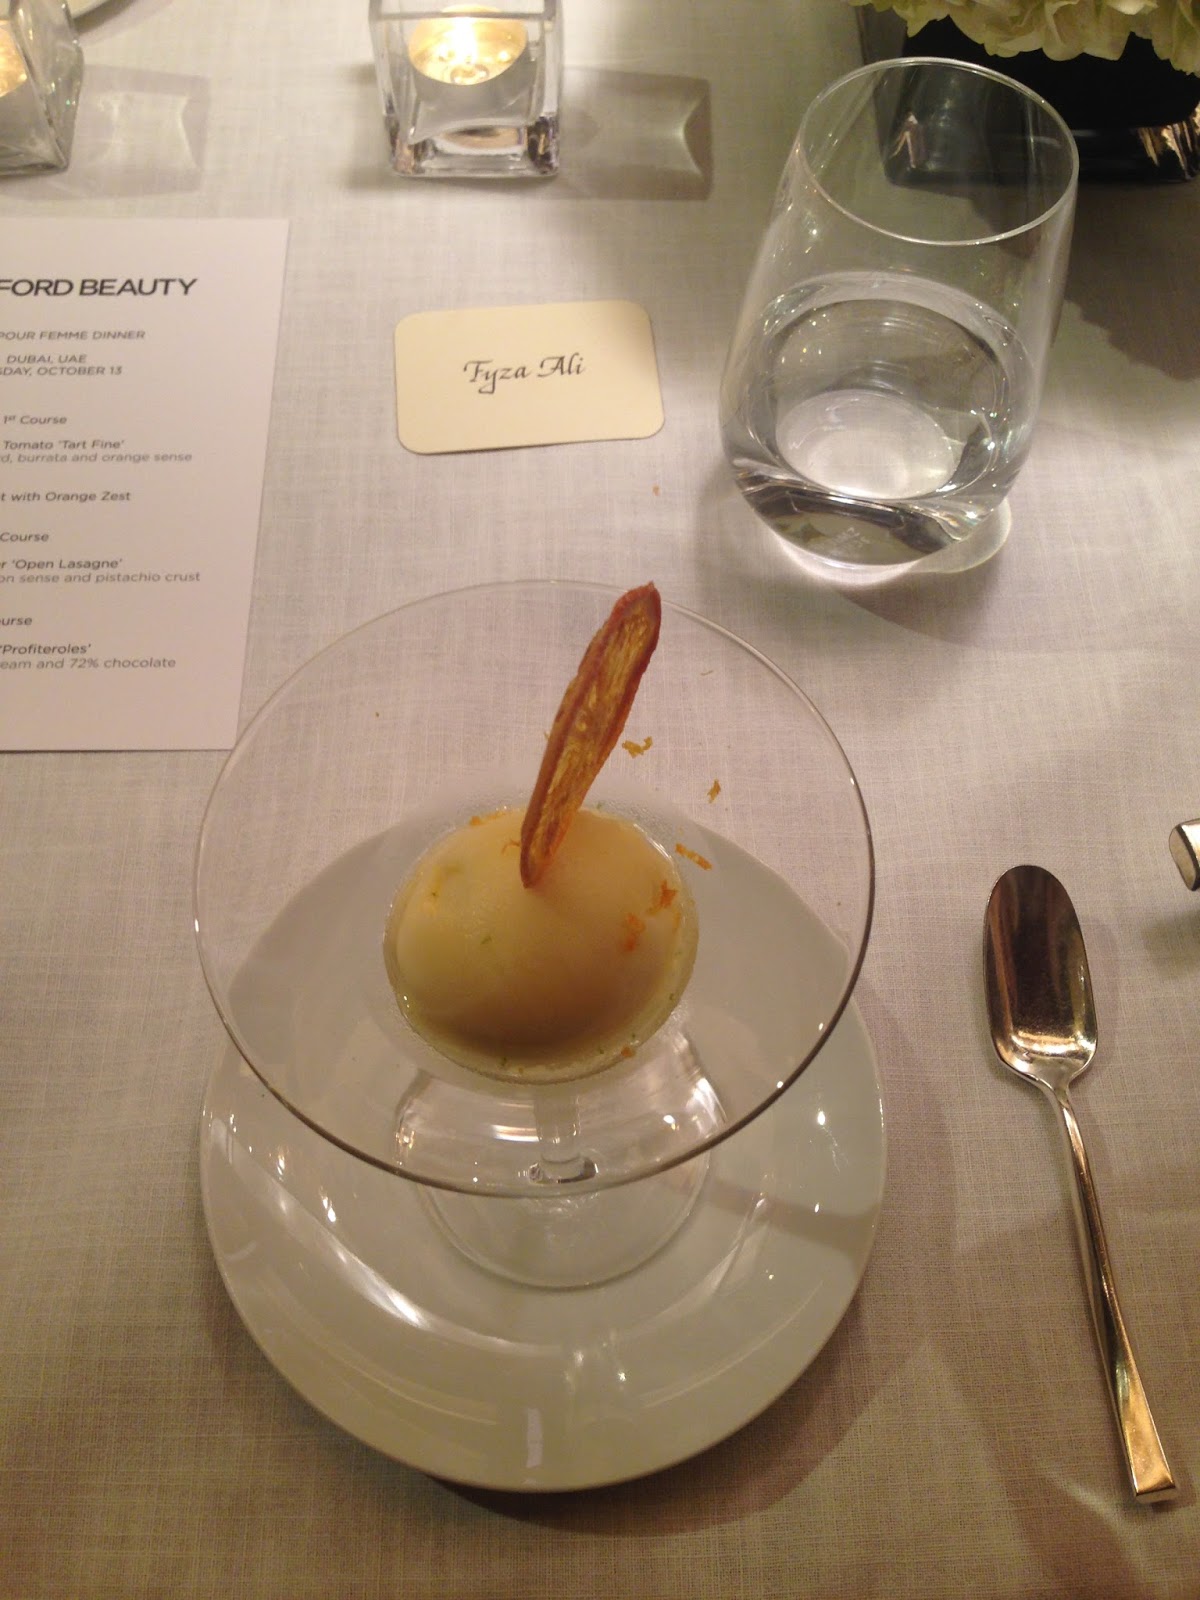


"This represents the top note, citrus based, the opulent. citruses including mandarin orange oil, bitter orange oil and ginger. This represents more of the confident side because its open, airy. We like to call this opulent" 
- First Note Scent Description

The main course was Brittany Lobster 'Open Lasagne' which was Kulfi royal cardamom-saffron sense and pistachio crust. 
with this dish I didn't really know what to expect. We were told that the base was a Kulfi cream, the middle was a pasta with lobster and a pistachio topping. Matthew explained what kulfi is and where it came from. The history to it was that it originates from India and it was a dessert that was made for the royals at the time. It was meant to be a cold dessert, much like ice cream. Ice would be collected from the Himalayan mountains and then this milk like texture was mixed in and topped with rose petals and pistachio. It was a dessert fit for a king! I thought this was really great to share as I love history of all countries.

This was the second note. 'Addictive'

"Sensual heart of florals, orange flower, Jasmine and rose absolute. this is where the sensual femininity comes."
- Second note scent description 

This scent was my fave and at this point I couldn't wait to try the actual perfume!

The final note was Provocative - the dessert.

This was Dame Blanche 'Profiteroles' - Pear Cremeux, vanilla ice cream and 72% chocolate. there was chocolate sauce on the side to pour over. 

"These are the base notes and what we smell are vanilla, amber and Australian sandalwood."

I wish you could smell the scent that I was smelling through the screen! It's so hard to put into words but i'm trying my best, haha!


We were finally given the Noir Pour Femme to try! This is probably my all time favourite by Tom Ford. I wasn't expecting this. It's made for every woman. It reminded me a lot of Bukhoor - بخور 

Which is wood chips that have been soaked in perfume oils and are burnt to create a beautiful scent around the house - mainly used in Middle Eastern households. The scent is usually rich and long lasting so this is what the new fragrance reminded me of. It is powdery, floral, fresh, zesty and rich all at the same time and we all agreed on this.


This was my first scent dinner and I learnt so much, I loved the atmosphere and I'm glad that this scent is finally launching in the Middle East. Thank you so much to Estee Lauder and Tom Ford for having me and thank you Matthew Tyler for your time. It's always great to learn more, whether it's makeup or fragrance related. Thank you for the all the makeup too, super excited to add more Tom Ford to my kit and makeup bag! 


Fyza Ali xxx


SHARE:
4 comments

Fun Blue Make-Up Look

Leave a Comment
I love a little colour once in a while! Recently I thought I haven't done make-up on my sister, Sonia in a while...so on one of my days off I decided to do that. I didn't think of a look in my head I just went with the flow.

She already had a fresh tan with the help of Million Dollar Tan and the 48C Middle East sun, so I knew I wanted the skin super bronzy.


SKIN PREP
I started skin prep with Kiehls ultra face moisturiser, Primed with Benefit Professional primer and i let that sit on the skin for a while before starting on the base.

FACE 
Colour Correction - of course I can't do a make over with out this. I corrected the redness around her nose with green corrector, a salmon coloured concealer around her eyes slightly. Once I blended that into her skin I used Benefit Cosmetics Boing concealer to conceal any blemishes individual with a small brush and also the under eyes, I used the concealer to go over the areas I corrected with the green and salmon concealer.


Using Motives Cosmetics colour perfection quad in medium dark I slightly contoured below her cheek bones, nose and forehead- I did this before applying any foundation, concentrating on perfecting the skin with concealer, it's always best to use more concealer than foundation. Using a mixture of L'oreal True Match and MAC face and body in C4 with a Beauty Blender to blend the contour and concealer together. I take a while to blend it all together until it is seamless, you're not supposed to be able to tell where you started and where you stopped. The skin should be glowing and contoured to perfection at this point - no harsh lines or muddy looking nose (if you want to know more about tones to contour i have a blog post on that too!)

To add a little OOMPH! to the under eyes I used Maybelline Age rewind foundation in Classic beige, this brightened the under eyes without the ashy/grey look. Blend with mini Beauty Blender for the best result.

EYES AND EYEBROWS
Primed with Benefit Stay Don't Stray eye primer, as a base colour I used a black kohl pencil starting form the lash line, I smudged that up to the crease using a Wayne Goss #20 Brush, I created a wing with the kohl pencil and smudged it to give a smokey effect, using the colour Naked from the Naked Palette I applied it to the crease using a Wayne Goss #19 brush, for the main blue colour I wet my Wayne Goss #18 brush  and with L'oreal infallible eye shadow in midnight blue and pressed it onto the lid, this intensified the colour. I blended that in the a clean fluffy brush so it blended in with the Naked crease colour, I finished the eyes by smoking out a black kohl pencil on the lash line and water line, wetting the brush again with the midnight blue colour and applying that on the bottom lash line.

I highlighted her brow bone and inner tear duct with Laura Mercier candle light highlighter.

For brows I used MAC brow pencils in lingering and spiked, setting them with Benefit Cosmetics Gimmie Brow blonde - this technique lightens the brows!

SETTING POWDERS AND BLUSHER
I set the under eyes with Colourless Ben Nye loose powder, I powder contoured with Smashbox bronzer, Cheek bone highlight by Laura Mercier loose powder in candle light, blusher is MAC fluer power.


LIPS
Estee Lauder Lip liner in nude with Nars Lipstick in Chelsea Girl


I used the buffing technique to blend it all together at the end!
If you want to know more about the buffing technique I use you can watch this video https://www.youtube.com/watch?v=I7XjD4a7xv8


I hope you benefited from this post.

Fyza xoxo
Instagram.com/soniaxfyza
soniaxfyza@gmail.com
SHARE:
0 comments

The BLACKEST eye liners EVER!!

Leave a Comment
There's nothing more annoying than your top liner fading during the day, or an eyeliner that turns light grey once it dries. No eye liner is perfect but our top 3 picks are close enough, We've tried and tested these long enough to say what we think about them including Pros and Cons. They all dry matte.

We have broken down around 10 eyeliners out there down to ONLY three - a high end, an affordable and one that is available in the Middle East so it's a win win for every one!

These are in no order! 

Benefit Cosmetics- They're Real - Push-up liner


So much to say about this product, It is a GEL, looks like a pen and has a screw on cap which is great because it won't fall off and end up at the bottom of your make-up bag. Love the grip, the fact that it's like a pen makes it so much easier to hold when applying. The end has a twist, you have to twist it to get the product out so you have fresh gel liner each time. In a pot you will notice gel liner dries up quick.


It has a rubber angled tip, it is a dream when creating your wing, glides on beautifully and you will find your self surprised when you get your liner perfect after using this for the first time. The angled applicator helps precision when placing your wing/flick, gets into the inner corner perfectly.

 Without Flash
With Flash

It's one of the blackest, the formula is great, staying power is 10/10, easy to remove with makeup remover.

CONS:
when you twist for the product to come out you have to apply it at the back of your hand first because there's a clump at the end of the applicator which is the only downside.


Kiko Cosmetics - Lasting Gel Eye Liner


So the packaging says it's a gel but it actually looks more like a thick ink, it has more of a jelly-like consistency, it is SO SO black! You will need a fine point brush to apply this. Kiko is a great affordable brand so you wouldn't be splurging out on this.

Without Flash


With Flash


You can see how black and matte this product is, the formula is great. If you're someone who has trouble with your top liners melting and transferring on to your crease this is the one for you, great for summer, vacation - waterproof so you can have the perfect liner stay put all day.

CONS:
To some people it will be a pro but this liner is VERY tough to remove, it's almost like a tattoo. You will need more than a makeup wipe to remove this stuff! Don't bother rubbing it. If you love your liners to stay put try this but we suggest you use an oil based makeup remover to remove this bad boy. More for a special occasion.

Elizabeth Helen Fluid Eyeliner


We ALWAYS stock up on this product when we visit the Middle East, the perfect liquid liner. SUPER BLACK Arabic eyeliner which is only available in the Middle East (We haven't searched online so maybe it is available outside the Middle East) Love the formula for everyday eyeliner. It dries matte, good size tube, has a screw on cap that is comfortable to hold when applying on yourself.


The applicator is a fine brush, easy to glide the very black fluid and to make a cat-eye wing.

Without Flash


With Flash


It's a liquid so it will take a while to dry. Gorgeous rich black colour, looks good in flash photography too!

CONS: The only thing we wish we good change about this product is how it transfers after around 5 hours if you have sweaty eye lids! some people will be okay but if you want to use this without an eyeshadow be sure to use an eye primer and dust some pressed powder on your eye lids before applying this.


We hope you found this post about the BLACKEST EYELINERS out there useful!

Fyza and Sonia xoxo


SHARE:
0 comments

Possibly the best brushes you could own!

Leave a Comment
Hey guys, hope you're all well. I've been trying a bunch of beauty related products lately and usually wait about two months max depending on the product before I review it. As a beauty lover and Make-up Artist we have to have the right tools, I have been raving about Wayne Goss brushes for 3 weeks now, I even took them with me to fashion week (had to mark each one, ha!) I'm going to tell you guys why these brushes are worth every penny (I'm not just saying this because I'm a huge fan of his and have been for as long as I can remember)

If you follow me on Instagram and take a look at the most recent photos I have posted of my work you will realise a difference in my application of Make-up and that's because of these brushes. On Instagram people are always asking "what foundation, what concealer?!" or "what contour?" it's not always about the products it's more about how you choose to use them and what tools you use with the products.

Amazing quality and they look pretty too!

My favourite have been the eyeshadow brushes, you can tell how much effort has been put into designing each brush, so precise, the hairs are soft and they blend your shadows together beautifully. My favourite one from the smaller brushes is the brush 08 - it's tiny and it's SO good for precision, I use it to get eyeshadow closest to the bottom lash line, to tight line and to fill in eyebrows and create those natural looking "hairs" with brow powder. 

Taped and marked the brushes so they don't get mixed with others!

Everyone asks me about contour! I have started to use a powder only and the most light-weight brush for this is brush 14, it's so light, feathery, gives the most natural contour hollow without the harsh obvious line, fits right into the hollows of the cheeks, it doesn't make the foundation or concealer move at all because of the way it has been created - the shape and length of the brush hairs.

I love the simplicity of these brushes, the way they are not only for make-up artists. They make applying make-up so much easier and I did my own research on these to find they are 100% cruelty free, natural hair bristles (this is why they are SO soft and feel like heaven on the skin) and hand crafted! I love how he just didn't get any old brushes made and stuck his name on them, you can tell that there was a lot of thought gone in to this, he is an artist and you can tell from using his brushes. I've always used a mixture of brushes and recently I have found myself picking at them only. They look so good on your vanity, in your brush belt and I LOVE taking them out on shoots. 


I use brush 20 to smoke out colours on the lash line, brush 15 to apply powder highlight, the white holiday brush to dust face powder and bronzer lightly. The brushes pick up the right amount of product, especially when you are lightly dusting some loose powder to set your makeup.

Here are some of the looks I created using only Wayne Goss brushes - They are available to purchase on www.beautylish.com 


This blog post is my own opinion.

Fyza xxx


SHARE:
0 comments

OUR TOP 7 CONCEALER PICKS

1 comment
The last few months have been really hectic so we're really sorry for not updating. My sister and I have been meaning to post about concealers for a while. We were actually going to post on our instagram but thought it would be way better on the blog since we can post more pictures and explain a lot more in detail.

Under eye concealer took me years to master and I'm still trying new ways till this day!


As most of you may know by now that I (Fyza) am the makeup artist and my sister (Sonia) is my model/muse. I test all my techniques on her so we both can review the product together. Sonia has probably been through more concealers than I have as a makeup artist, We are both beauty junkies so we hope both our opinions will benefit a lot of you out there!

Sonia tries concealers that are more for everyday whereas I test them out for photographs since all my clients are going to be photographed at shoots or events. So here are our picks, let us know your faves  too and why :)

1. Laura Mercier Secret Camouflage Concealer.
This concealer is probably my most used. It has two tones in one which allows you to mix both colors depending on how you want your under eye concealer to look. It is amazing for redness and it blends beautifully. I love how long wearing this product is and it is suitable for all skin types (yay)
I like to use this product with my fingers because the warmth of my skin helps melt the concealer and makes it easier to apply (i love using my ring finger because it doesn't tug the under eye like a brush would.)


2. Maybelline Instant Age Rewind Concealer.
A drugstore concealer! yes! The price isn't the only good thing about this because the product itself does wonders! It already has a soft applicator attached which is perfect for the sensitive eye area. This product works great as a correcter for dark circles, puffiness and fine lines! I love the light weight feel of it and it's for all skin types. Everyone should try this at least once (perfect for everyday)


3. NARS Radiant Creamy Concealer.
Probably one of the best concealers out there. The name of this product basically speaks for itself. It's creamy, light weight, blends so well AND is creaseproof! I love a concealer that will work well with all skin tones/types and this is one of those concealers that is great for the kit and one for your own makeup bag. The coverage is buildable and it creates a soft, glowy under eye that almost looks like a blur effect of an app - so it's great for your selfies!


4. Benefit Cosmetics Boi-ing Concealer.
This concealer has a love-hate relationship with some people but i really like this product. I like the consistancy and a little goes a long way, again this is one of those products that works best when using your fingers. It works really well for under eye discoloration and the coverage is perfect. The shade range is good because of the undertones of the concealers, they work great as correctors because of the salmon undertone.


5. Tarte Cosmetics Colored Clay CC undereye corrector.
Tarte is one of those brands that has so many great products that have benefits for the skin too. I came across this concealer randomly, It's more of a corrector actually. It is available in two shades which is the only downside to it. Th coverage and texture is just right and works SO well for discoloration and dark circles (it even improves the appearance of skin after you use it for a while) I would usually use this under foundation.


6. MAC Select Cover Up
I like using this concealer after a correcter because it is so light in texture and it worked perfectly as a under eye highlight. I blend this concealer with a beauty blender and it melts in with the corrector. Radiant and has the 'no makeup makeup' look to it. If your afraid of the whole contour and highlight I suggest using this as a subtle highlight. I love the fact it comes in a tube :)


7. Clinique Airbrush Concealer 
Best for those girls who never have enough time to apply their makeup in the morning! It is a concealer twisting pen/ brush applicator. This concealer works best for when you want the under eye bright look if you look tired. I did notice how good it is for fine lines. The coverage is ok, it's a light weight concealer that is perfect for everyday work/school makeup.


We have chosen these concealers as our faves because we have tried and tested them. I hope you guys find the right under eye concealer because we all have different preferences and that's one of the things that was the toughest to perfect. If you have tried any of these let us know how they worked for you :)


Fyza and Sonia x
SHARE:
1 comments

Chantel Jeffries Makeup

11 comments
As a lot of you know I was the make-up artist for Chantel Jeffries while she was in London. I had a great time working with her and she is such a sweet girl. Her face is a dream to work on and made my job a lot easier (haha!) I did a few looks on her and I thought I'd give product break downs of what I used for each look since I got so many questions.

This was the first look I did on Chantel "fresh off the jet" as she said xD
Because she was on such a long flight and had some puffiness around her eyes I prep'd her skin first. Skin is so important, even if I'm working with models I take care of their skin because they have to wear a lot for shoots. I used Eyebright Soothing Eye Lotion by Liz Earle, it instantly calms itchy, puffy eyes. For all over the face I used Embryolisse moisturiser and Too faced pore primer. I let all that sink into the skin before applying foundation.

Foundation - Makeup forever HD foundation in 153 Golden honey blended with a Beauty Blender. Using a beauty blender gives it more of the flawless airbrush finish and no brush strokes! For under eyes I used the Motives color perfection quad in light - reason I used a foundation because I feel as if concealers and highlight sticks oxidise under the eyes and end up looking cakey and gray after a while, so using the motives quad is much for blend-able. I used the darker quad for a cream contour and blended it all together with a beauty blender and setting it with Anastasia Beverly hills contour kit. I usually set the under eyes with a colorless loose powder.

The base is prepped for eye make-up and brows. Priming the eye area with too faced shadow insurance, starting with smoking out smoulder by mac on the lash line and BLENDING  it with cork by MAC not going past the brow bone. I did the same on the lower lash line using a Kiko mascara and added two pairs of Huda Beauty Giselle lashes for that extra drama. Cheek bone highlight is Laura Mercier Candle light and this blush is soo pretty I got it at Sephora in Madrid (pictures) For the lips I used 1C MUFE lip liner and I mixed Yash lipstick by MAC. (Setting your make-up with powder and a powder brush gives you the real life Photoshop finish)
SUNKISSED BRONZE NO3


The Summer Glow
This was my fave look to create 
I prepped the skin the same way except I didn't use the too faced primer, I used the MUFE HD primer (white)
I used MAC face and body foundation in C4 (Chantel's foundation and concealer colors are the exact same as Sonia's for all the people who ask about Sonia) I used Laura Mercier Secret Camouflage Concealer in SC4. Even though this is a dewy look we still have to set it with powder ALWAYS. without powder your make-up will be running and melting the first hour. I have to make sure every one's skin is set and prepared for all those flashes and lights. I powdered the skin the same way and added the glow later using Laura Mercier Candle light (I love loose powders to highlight when going for a dewy look) I contoured with Charlotte Tilbury Kit very lightly & used a cream blush by NARS called Enchanted.

Brows: Anastasia Beverly Hills brow wiz pencil in Brunette and brow powder in soft brown.
Eyes I lightly dusted gold and bronze colors from Urban Decay Naked palette (1), I curled Chantel's lashes with Kevyn Aucoin lash curler to prep them for individual Lashes by Huda Beauty in Alyssa coating them with L'Oreal carbon black mascara on top and bottom lashes.

Lip liner is Nutmeg by NYX with NUDE BALLET  Liquid Lipstick gloss  L'Oreal.


Vampy Lip
MUFE HD foundation, MAC pro Longwear concealer (it's not as thick has a cream or stick concealer)
I blended the concealer with a MAC 217 brush. Lashes are Huda Beauty Monique and I used Motives eye shadows to create a subtle cut crease and smoked out Onyx on lash line. NARS Orgasm Blush, Anastasia Beverly Hills to contour. Lip products were amazing and are not expensive at all
SEPHORA 09 PLEASANT PLUM
KIKO 12
I hope this answered your questions, I'm still trying to get the hang of blogging so be patient :)
SHARE:
11 comments
Previous PostOlder Posts Home
BLOGGER TEMPLATE BY pipdig